

Turn your kitchen into a chemistry lab with these simple science experiments! Get creative using minimal materials from your pantry.
Kitchen Science Experiments
Fizzing Colors

Who says chemistry has to be complicated? You only need three ingredients for this experiment: baking soda, food coloring, and vinegar. When you combine the ingredients, a chemical reaction occurs and results in a bubbling eruption of fizzing color!
Learn more: Fizzing Colors
Magic Mug Cake

Normally, a cake would take an hour or more to make in an oven, but with a microwave oven, you can make one in minutes! Make this delicious chocolate mug cake and learn about the science of Microwaves ovens. Experiment with the other ingredients to customize your mug cake. What will you add to give it a whole new flavor?!
Learn more: Magic Mug Cake
Turn Milk into Cheese

You may remember hearing about curds and whey from the old nursery rhyme about Little Miss Muffet. Well, this kitchen science experiment will teach you what curds and whey are, and you’ll even make some yourself! You can eat cheese curds on their own (they taste like ricotta cheese) or top with honey or fruit for an awesome treat.
Learn more: Turn Milk into Cheese
Hopping Grains
In this experiment, you’ll observe how carbon dioxide bubbles stick to the grains in the glass, lifting them up to the surface of the water. But when the bubbles reach the surface, they pop. Without the bubbles to hold them up any more, the grains sink back down to the bottom. Then the whole process repeats, giving you hopping grains in a cup!
Learn more: Hopping Grains
Maple Syrup Crystals

Test out the effects of temperature with this sweet science experiment! When you pour hot maple syrup onto a cold pan, sugar molecules slow down, combine, and then harden into solid crystals.The best part is, you can eat the crystals once you’re done with the experiment! Heads up: A grownup is needed to help operate the stove!
Learn more: Maple Syrup Crystals
Apple Oxidation Experiment

Have you ever noticed that if you slice an apple in the morning, it turns brown by lunch? This is actually a chemical reaction at work! In this experiment, you’ll learn more about how the oxygen in the air around us causes this reaction (also known as oxidation). Test different liquids to see if you can figure out a way to keep apples fresh from morning to noon.
Learn more: Apple Oxidation Experiment
Frozen Color Mixing

Experiment with color creation! Primary colors (red, blue, and yellow) are the source of all other colors. Secondary colors (green, purple, and orange) are created when two primary colors mix. If you freeze up colored ice cubes, you can experiment with color mixing as they melt.
Learn more: Frozen Color Mixing
Juicy Gel Bubbles

Make fruity gel bubbles that pop in your mouth! The magic ingredient is agar powder. Agar powder is a gelling agent that comes from a type of algae. Make multiple batches in different colors!
Learn more: Juicy Gel Bubbles
Rock Candy
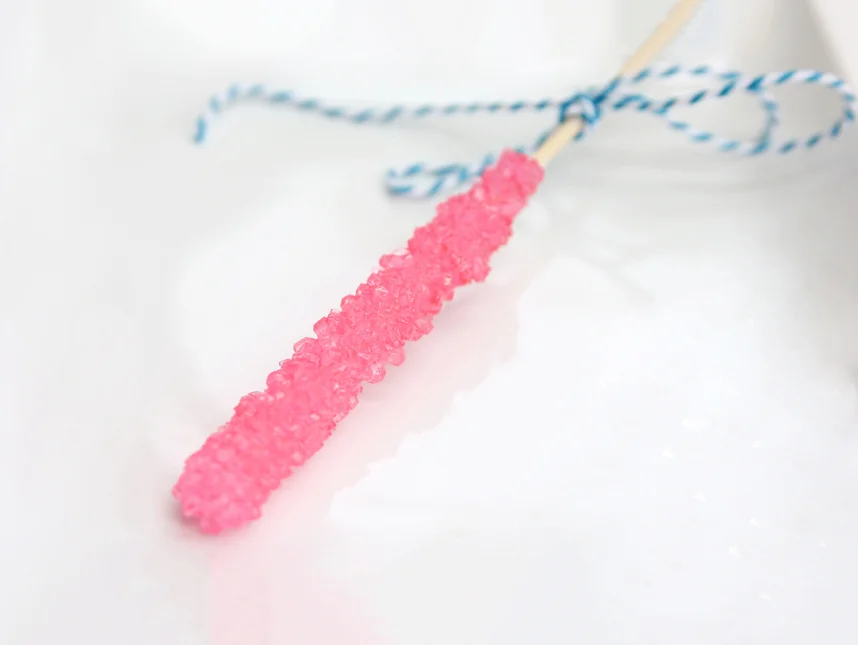
Did you know you can grow your own sugar crystals at home? In this experiment you’ll learn about crystal growing science while making edible sweet treats.
Learn more: Rock Candy
Cabbage Chemistry

Color your world with cabbage and learn about chemistry! The terms acid and base describe chemical properties of many things we use everyday. Sometimes, you can tell if something is an acid or base by the way it tastes. Instead of a taste test, chemists use a pH scale to measure the strength of acids and bases. In this project, you’ll test different substances in purple cabbage juice and compare the results to a printable pH scale.
Learn more: Cabbage Chemistry
Homemade Marshmallows

Marshmallows are made by beating together gelatin (or other gelling ingredient) with a hot sugary syrup. When you beat the mixture, you create air bubbles. These bubbles become trapped as the hot liquid cools into a gel creating the fluffy texture. Marshmallows are mostly sugar, but air actually makes up more than half their volume!
Learn more: Homemade Marshmallows
Glow in the Dark Gelatin

Why does this gelatin glow? The active ingredient in tonic water is quinine, a fluorescent substance. Fluorescent substances absorb energy from other light sources and then release this energy as light in its natural state. In this case, the quinine absorbs the energy from the UV light and emits some of that energy back in the form of a visible blue light. This is what gives your gelatin its glow!
Learn more: Glow in the Dark Gelatin
Water Wheel
Create a waterwheel to learn how to convert the energy of falling water into a power source! The water wheel is an ancient device that converts the flow of water into the motion of a wheel. Falling water pushes down on the cups of the water wheel, turning the wheel in one direction. As the cups move around the wheel, they dump out their water, preparing them to be filled back up when they’ve rotated back to the top of the wheel. Water wheels provided mechanical power to communities around the world starting around 400 BCE, helping people pound wheat into flour or saw logs in half. Today, modified water wheels, known as turbines, can be found inside of hydroelectric dams, where they convert the motion of falling water into electricity.
Learn more: Water Wheel
Water Cycle Bags
Create a water cycle bag and learn about earth science! Observe how water is influenced by many things, such as energy from the sun, temperature, and the force of gravity. Try creating a second bag and placing it in a different location (perhaps a shady window) and see how the results differ. You can also leave the bag for a few days and check on it at different stages. See how time of day, temperature, and amount of sunlight affects it!
Learn more: Water Cycle Bags
Neon Rice

Sensory bins on their own make for hours of fun, but when it glows, they go to the next level. For this project, all you need is some rice, glowing neon paint and a black light. After all our colors were ready for play, we switched on a black light, making for an extra magical playtime!
Learn more: Neon Rice
Make Your Own Slime!

All you need for this awesome experience is glue, borax, and a few other common kitchen ingredients. Kids will love the cool (/ gross!) sensory activities that you can do with slime! Explore together and have a gooey blast!
Learn more: Make Your Own Slime!
Making Green

Create the color green in different temperatures of water and explore awesome scientific concepts like dispersion! Observe how warm, room temperature, and cold water form different shades of green.
Learn more: Making Green
Creating Salt Crystals

There is something fascinating about taking common objects and creating something new with them. Experiment with rocks, salt, and water to see what happens, and explore the awesome science of crystallization!
Learn more: Creating Salt Crystals

Try to lift a ball off the table… without touching it! Discover centrifugal force and dive into physics with this simple kitchen experiment. Spinning a ping pong ball in a wine glass will cause the ball to press against the wall of the glass, allowing it to lift up off the ground!
Great fun! Thanks!
It sound great this is making me hungry
These are great ideas for experiments. I can’t wait to try them with my son.
We love Kiwi crates!!
Thank you.
Thank you Kiwi for these fun free exercises, they keep us learning and laughing!
what a wonderful idea, Kiwi! thank you for your creativity, your thoughtfulness regarding at home kids, and your continued efforts too bring science and crafts to my grandchildren
Doris Fenig
Wow
Thank you. Great ideas.
Very nice ideas to try and keep kids busy, but learning at the same time. Thanks for the helpful ideas, especially now. Stay safe and well and God bless.
Great ideas! Will definitely try them out
I think the Juicy Gel Bubbles experiment may need some tweaking. We followed the instructions exactly (1 cup juice, 1 teaspoon agar) but our bubbles were solid gel all the way through…so we ended up with a bunch of oily globs of jello.
Good old vinegar and bi carb! Works every time. Maddy loved the fizzy colours. She worked out that blue and yellow made green and red and yellow made orange. Kept on mixing until she had a big dark fizzy mess, then I put it down the sink to help clear the drains. Couldn’t be better.
Robin Tuttleby.
Interesting activities!